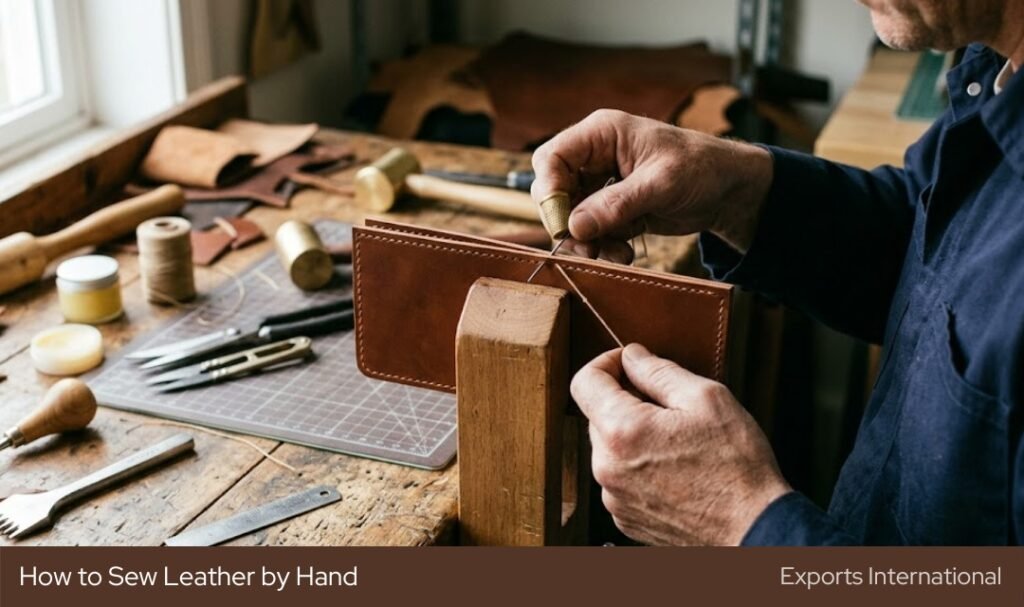
The first time most people try to sew leather, they either snap their thread or pull their needle through at the wrong angle and tear the hole. Both are avoidable with a little preparation.
Hand sewing leather is actually one of the most satisfying skills in leatherwork. The stitches are tight, they last longer than machine stitches, and a saddle-stitched seam will outlast the leather itself if done right. Here’s how to do it properly from the start.
What You Need Before You Start
You cannot sew leather with regular fabric needles and thread. The material is too dense and the holes need to be pre-punched. Here’s what you actually need:
Needles: Use harness needles, sometimes called blunt needles. They have a blunt tip that passes through a pre-punched hole without splitting the leather further. You need two for saddle stitching.
Thread: Waxed linen or waxed polyester thread. Waxed thread slides through holes easily, holds tension well, and resists moisture. If your thread is not already waxed, pull it across a block of beeswax a few times before you start.
Stitching chisel or pricking iron: This is what makes your holes. A stitching chisel punches multiple evenly spaced holes in one strike. This keeps your stitch line consistent without any measuring by hand. A pricking iron does the same job but leaves angled holes that make stitches sit at a slight angle, which looks cleaner.
Awl: For punching individual holes or opening up holes that the chisel did not go all the way through on thick leather.
Wing divider or stitching groover: Use this to mark a consistent line along the edge of the leather before punching holes. It keeps your stitch line the same distance from the edge throughout.
Rubber cement or contact cement: To hold two pieces together while you stitch. This is not the final bond, just keeps things from shifting while you work.
Mallet: To drive the chisel through the leather cleanly. Do not use a hammer. A wooden or rubber mallet gives you control.
Clamps or binder clips: To hold pieces in place while the cement dries.
Prepare the Leather First
Do not just pick up a needle and start. Leather needs to be prepped before you sew.
Step 1: Trim and skive your edges. If you are joining two pieces, make sure the edges are clean and even. If the leather is thick at the fold line, skive (thin) the edges so the seam sits flat once stitched.
Step 2: Apply cement. Apply a thin, even coat of rubber cement to both pieces you are joining. Let it become almost dry to the touch, then press the pieces together firmly. This is your alignment before stitching. Once the stitch is in, this bond becomes permanent.
Step 3: Mark your stitch line. Run a wing divider or stitching groover along the edge. Typically 3 to 4 mm from the edge works for most projects. This line tells you exactly where to punch your holes.
Step 4: Punch your holes. Place your stitching chisel on the line and strike it firmly with a mallet. Move to the next position, overlapping one prong into the last hole so your spacing stays consistent. Punch all holes before you start stitching.
How to Saddle Stitch Leather
Saddle stitching is the standard for hand-sewn leather. Unlike a machine lockstitch, saddle stitching passes two threads through every hole from opposite sides. This means if one thread breaks, the other holds the seam together. It is stronger, cleaner, and the reason hand-sewn leather lasts longer than machine-sewn.
Step 1: Cut your thread. A good rule: cut thread about 2.5 times the length of the seam you are stitching. So for a 20 cm seam, cut 50 cm of thread. Thread one needle on each end.
Step 2: Start at the first hole. Push the first needle through the first hole and pull the thread until you have equal length on both sides.
Step 3: Start the stitch. Push needle one through the second hole from front to back. Before pulling it tight, pass needle two through the same hole from back to front, making sure it goes on top of needle one’s thread. Then pull both needles in opposite directions until the stitch is tight.
Step 4: Repeat. Move to the next hole and repeat. Always pass needle two over needle one’s thread inside the hole. This is what locks the stitch and keeps it from unraveling.
Step 5: Finish the seam. When you reach the end, backstitch through the last two or three holes to lock the thread. Pull tight, then trim the thread close to the surface. Run a lighter flame briefly past the thread end to melt it slightly if you are using polyester thread. For linen thread, just cut it flush.
Common Mistakes and How to Avoid Them
Holes too close to the edge. If your stitch line is less than 3 mm from the edge, the leather can tear between the hole and the edge under tension. Give yourself at least 3 mm, preferably 4 mm on thicker leather.
Uneven tension. Pull each stitch with the same force every time. Inconsistent tension makes the stitch line look uneven and weakens the seam. Develop a rhythm and stick to it.
Thread not waxed. Unwaxed thread tangles, frizzes, and degrades faster. Always wax your thread.
Skipping the cement step. If you try to stitch pieces without gluing them first, they will shift while you work and your holes won’t line up on both sides.
Using the wrong needle. A sharp needle that punctures between holes will split the leather and weaken the seam. Use blunt harness needles through pre-punched holes.
A Quick Reference
| What you need | Why |
|---|---|
| Blunt harness needles (x2) | Pass through pre-punched holes without tearing |
| Waxed linen or polyester thread | Strong, smooth, moisture-resistant |
| Stitching chisel or pricking iron | Even, consistent hole spacing |
| Awl | Opening tight holes, thick leather |
| Wing divider | Consistent stitch line from edge |
| Rubber cement | Hold pieces together while stitching |
| Mallet | Drive chisel cleanly |
About MB Exports
At MB Exports, we manufacture and export hand-stitched and machine-stitched leather goods from India. Every product that leaves our facility is built the way it should be, with the right leather, the right thread, and stitching that holds.
If you are sourcing leather goods for your brand and want quality that lasts, get in touch with us.